Difference between revisions of "LiteBee Drone:bit"
| (5 intermediate revisions by the same user not shown) | |||
| Line 183: | Line 183: | ||
You can also download it directly: | You can also download it directly: | ||
| + | [[File:Drone-bit-case-03-04.png|500px]] | ||
| + | ===Result=== | ||
| − | + | After taking off, it flys forward for 100cm and lands to the ground, then it starts flying back in 100cm by rotating 180 degress, then it lands to the ground. | |
| − | |||
| − | == | + | == Case 04: Remote Control with Joystick:bit V2 == |
| − | |||
| − | |||
| − | |||
| − | |||
| − | |||
| − | |||
| − | |||
| − | |||
| − | == | + | ===Introduction=== |
| − | |||
| − | |||
| − | |||
| − | |||
| − | |||
| − | |||
| − | + | Control the drones with the Joystick:bit V2. | |
| − | |||
| − | |||
| − | |||
| − | + | ===Products Link=== | |
| − | |||
| − | + | 1 x [Drone:bit] | |
| − | |||
| − | + | 1 x [Joystick:bit V2] | |
| − | |||
| − | |||
| − | [ | ||
| − | |||
| − | |||
| − | + | ===Picture=== | |
| − | + | [[File:Drone-bit-02.png|500px]] | |
| − | |||
| − | |||
| − | |||
| − | |||
| − | |||
| − | |||
| − | |||
| − | + | ===Software Programming=== | |
| − | + | Click “Advanced” in the MakeCode drawer to see more choices. | |
| − | |||
| − | |||
| − | |||
| + | [[File:Drone-bit-case-01-01.png|500px]] | ||
| − | + | For programming, we need to add a package: click “Extensions” at the bottom of the MakeCode drawer and search with “https://github.com/elecfreaks/pxt-Dronebit” in the dialogue box to download it. | |
| − | |||
| − | |||
| − | |||
| − | |||
| − | |||
| − | |||
| − | |||
| − | + | [[File:Drone-bit-case-01-02.png|500px]] | |
| − | |||
| − | [[File: | ||
| − | |||
| − | |||
| − | |||
| − | + | Notice: If you met a tip indicating that some codebases would be deleted due to incompatibility, you may continue as the tips say or create a new project in the menu. | |
| − | + | ===Program=== | |
| − | |||
| − | |||
| − | |||
| − | + | The Remote Control Part: | |
| − | + | [[File:Drone-bit-case-04-03.png|500px]] | |
| − | [[File: | ||
| − | |||
| − | |||
| − | + | Link: https://makecode.microbit.org/_9WA7g9Rm5cyu | |
| − | + | You can also download it directly: | |
| − | |||
| − | + | [[File:Drone-bit-case-04-04.png|500px]] | |
| − | + | The Drones Part: | |
| − | |||
| − | |||
| − | + | [[File:Drone-bit-case-04-05.png|500px]] | |
| − | + | Link: https://makecode.microbit.org/_05Hc6fTUcRTr | |
| − | |||
| − | + | You can also download it directly: | |
| − | |||
| − | |||
| − | |||
| − | |||
| − | |||
| − | |||
| − | |||
| − | |||
| − | |||
| − | |||
| − | |||
| − | |||
| − | |||
| − | |||
| − | |||
| − | |||
| − | |||
| − | |||
| − | |||
| − | |||
| − | |||
| − | |||
| − | |||
| − | |||
| − | + | [[File:Drone-bit-case-04-04.png|500px]] | |
| − | === | + | ===Result=== |
| − | + | Turn on the Joystick:bit V2 and the drone, you can send commands via Joystick:bit V2 after its vibration. | |
| − | |||
| − | |||
| − | |||
| − | |||
| − | |||
| − | |||
| − | |||
| − | |||
| − | |||
| − | |||
| − | |||
| − | + | Each command is only working after the Joystick:bit V2 gets vibrated. | |
| − | + | The flying directions could be controlled by the stick. | |
| − | |||
| − | |||
| − | |||
| − | |||
| − | |||
| − | |||
| − | |||
| − | |||
| − | |||
| − | |||
| − | |||
| − | |||
| − | |||
| − | + | Press button to fly the drone and button B to give landing command. | |
| − | + | Press button C to make the drone rotate left in 90 degrees and button F to rotate right in 90 degrees. | |
| − | |||
| − | |||
| − | |||
| − | |||
| − | |||
| − | |||
| − | |||
| − | |||
| − | |||
| − | |||
| − | |||
| − | + | Press button D to add the altitude and E to lower it. | |
| − | |||
| − | |||
| − | |||
| − | |||
| − | |||
| − | |||
| − | |||
| − | |||
| − | |||
| − | |||
| − | |||
| − | |||
| − | |||
| − | |||
| − | |||
| − | |||
| − | |||
| − | |||
| − | |||
| − | |||
| − | |||
| − | |||
| − | |||
| − | |||
| − | |||
| − | |||
| − | |||
| − | |||
| − | |||
| − | |||
| − | |||
| − | |||
| − | |||
| − | |||
| − | |||
| − | |||
| − | |||
| − | |||
| − | |||
| − | |||
| − | |||
| − | |||
| − | |||
| − | |||
| − | |||
| − | |||
| − | |||
| − | |||
| − | |||
| − | |||
| − | |||
| − | |||
| − | |||
| − | |||
| − | |||
| − | |||
| − | |||
| − | |||
| − | |||
| − | |||
Latest revision as of 15:25, 12 October 2021
Contents
Introduction
Drone:bit Kit
The first drone assembled by yourself
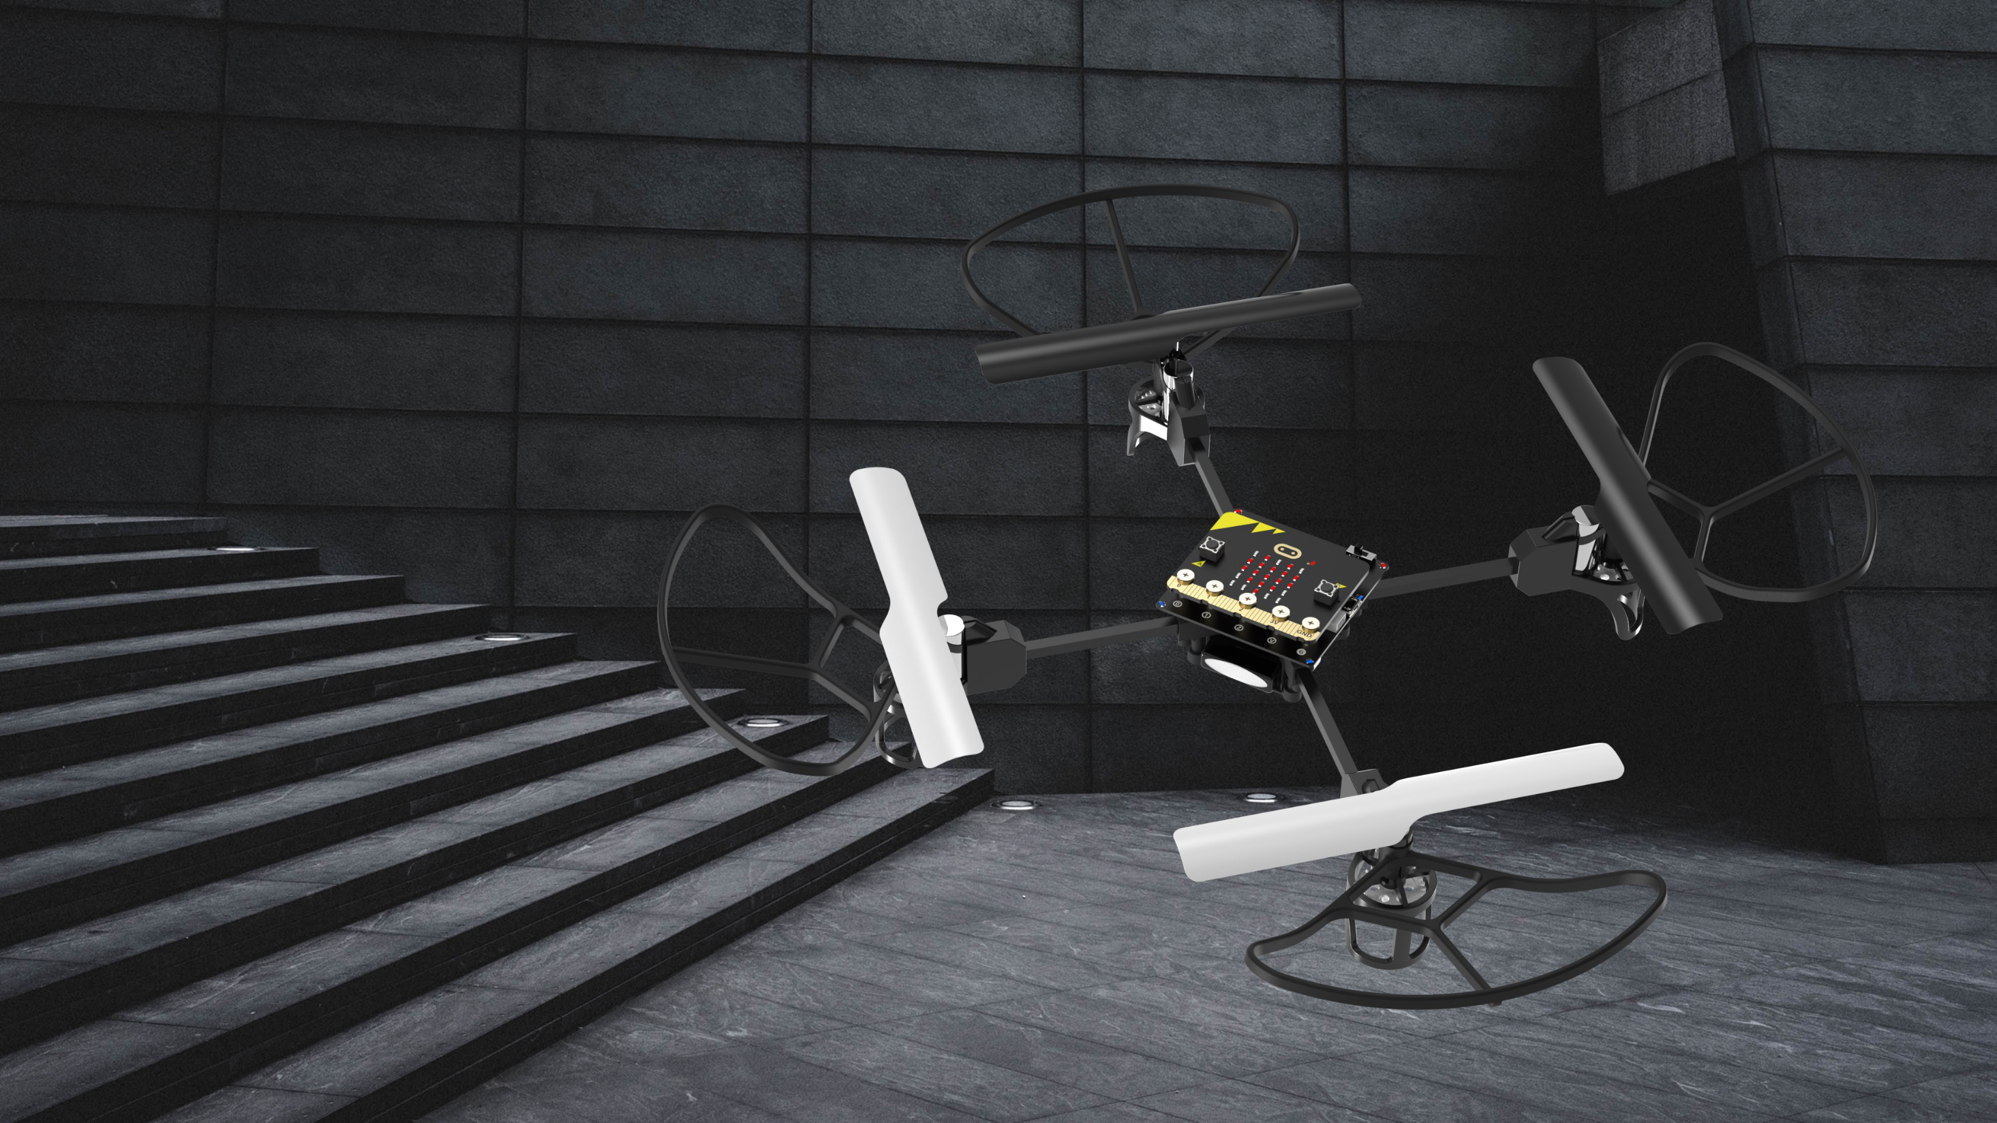
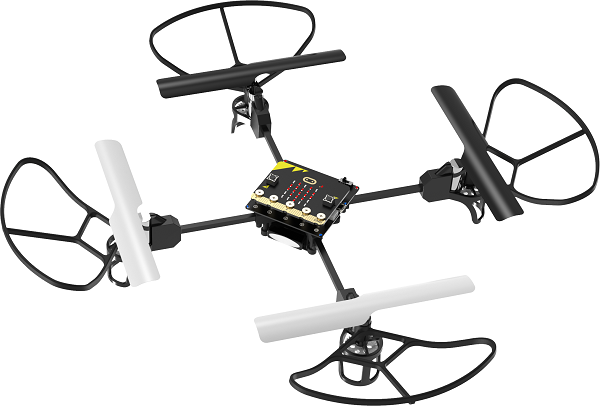
The Exciting Drone:bit Kit The micro:bit Drone:bit Kit has successfully combined micro:bit with drones, which has provided another possibility for students to create and explore in the sky. Through your operation, you can give it commands of hovering at a fixed altitude , flying from a waypoint, curvilinear flight, and rolling in the sky etc. even in the classrooms, get your first professional micro:bit Drone:bit Kit now!
Drone:bit
Optical flow locating, TOF fixing altitude It is a kind of drone in professional grade which is able to hover indoors in a waypoint , with build-in optical flow sensors in high sensitivity and TOF sensors, they help to hover and locate in a more precise way.
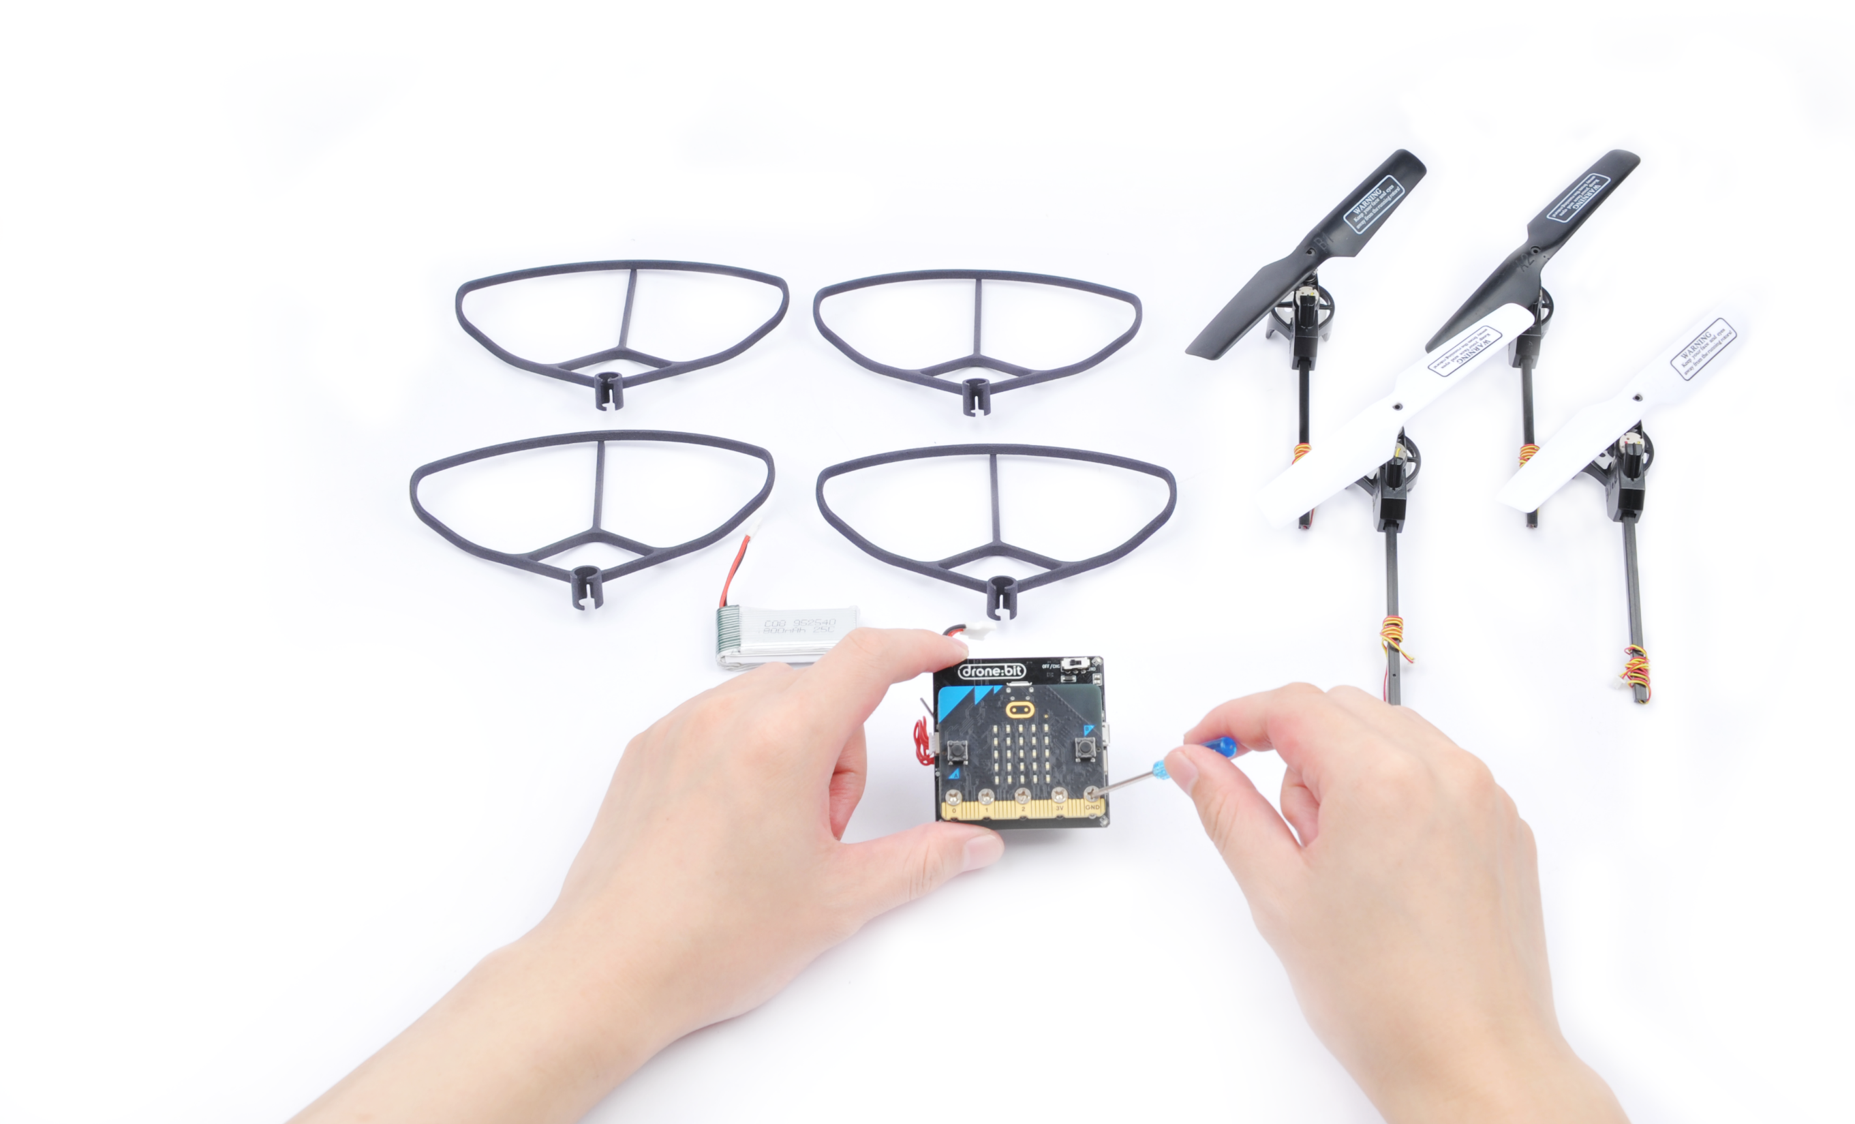
DIY fun Assemble by yourself, enjoy the fun from DIY.
Create your infinite artworks through coding Simple graphical and Python programming, available for complicated flying routines, flying gestures and rolling etc., there are more possibilities waiting to be explored.
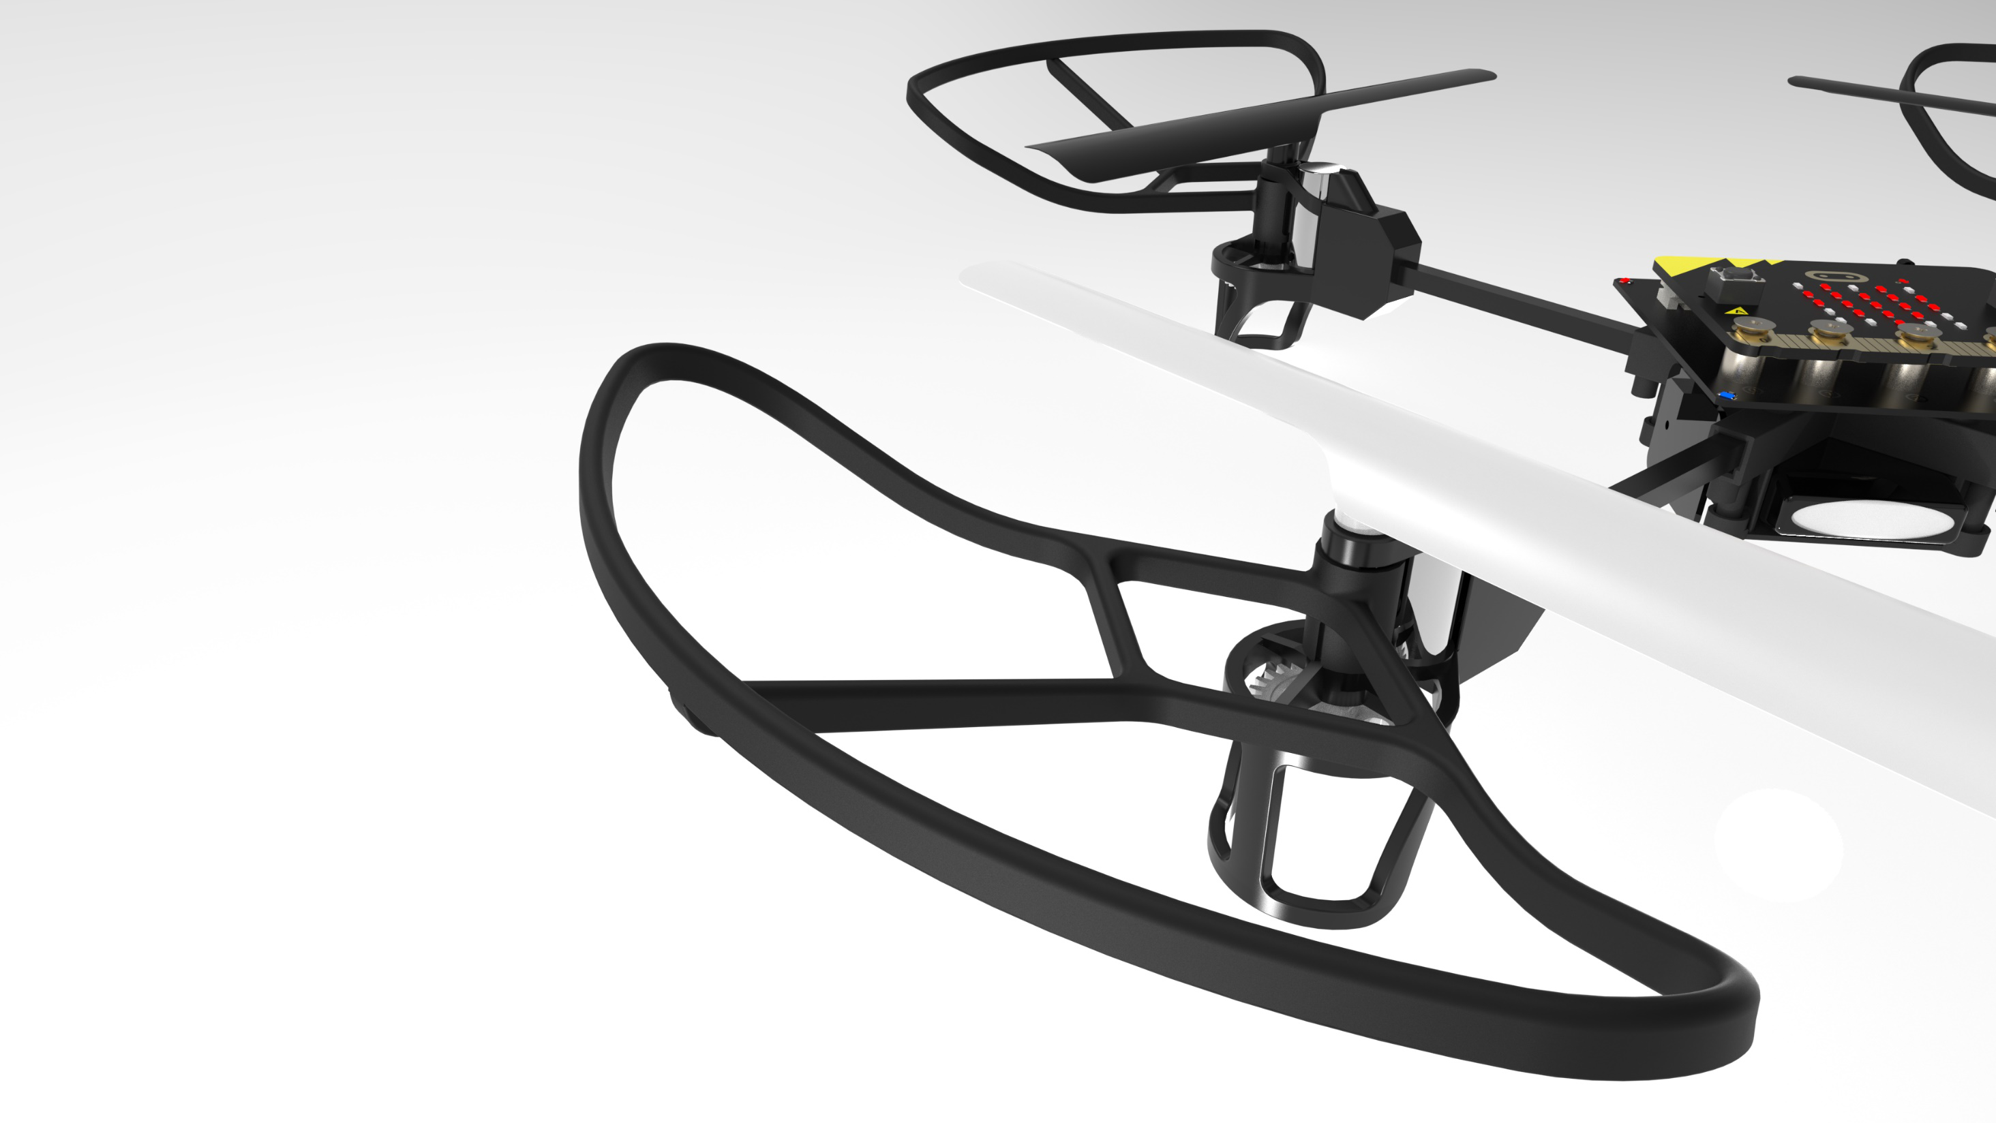
Safe flying The sealed propeller guards give you a safe flying experience.
- Self-assembled Drone
Assembled by yourself and enjoy the fun from DIY
- Programmable for More Projects
Simple graphical and Python programming, available for complicated flying routines, flying gestures and rolling etc., there are more possibilities waiting to be explored.
- 120° Propeller Guards
The sealed propeller guards make sure your drone fly safely.
- Available Flight in Classrooms
Drone:bit could fly in the classrooms!
Spcification
Rated Voltage               3.7V
Battery Capacity            800mAh
Charging Voltage            5V
Charging Current            0.8A
Charging Port               Micro-USB
Power Protection            Over Charge/Discharge Protection
Propeller Guards            Support
LED                         5 PCS (one for power indicator, four for status indicator)
Waypoints                   Optical Flow
Fixing Altitude             Barometer + TOF
Micro:bit Programming       Support
2.4G Remote Control Mode    Support
Flying Time                 8min
Case 01: Hovering at A Defined Altitude
Introduction
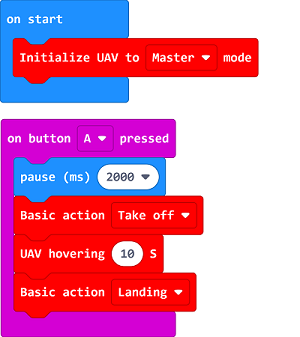
Program to make the micro:bit Drone:bit Kit take off and hover for 10 seconds, then it lands to the ground.
Products Link
1 x Drone:bit
Picture
Software Programming
Click “Advanced” in the MakeCode drawer to see more choices.
For programming, we need to add a package: click “Extensions” at the bottom of the MakeCode drawer and search with “https://github.com/elecfreaks/pxt-Dronebit” in the dialogue box to download it.
Notice: If you met a tip indicating that some codebases would be deleted due to incompatibility, you may continue as the tips say or create a new project in the menu.
Program
Notice: It is suggested to pause for 2 seconds or longer after triggering the take-off command to make sure the operator run away from the drones in case of any hurting accidents.
Link: https://makecode.microbit.org/_cu82jPKtwa2E
You can also download it directly:
Result
The micro:bit Drone:bit Kit takes off and hovers for 10 seconds, then it lands to the ground.
FAQ
Notice: For better locating of the drones, a complicated groud is prefered. If the groud is in single color, the drones might not locate them well.
Case 02: Fly Foursquare
Introduction
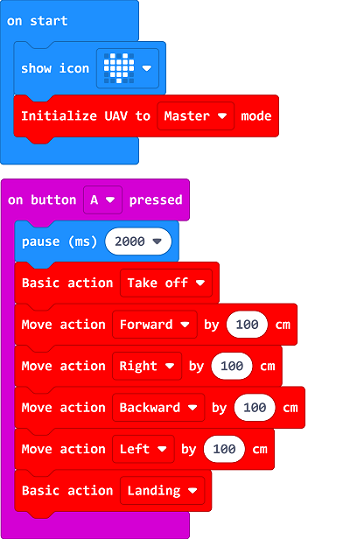
Program to take off the drone and fly foursquare, then it lands on the ground.
Products Link
1 x Drone:bit
Picture
Software Programming
Click “Advanced” in the MakeCode drawer to see more choices.
For programming, we need to add a package: click “Extensions” at the bottom of the MakeCode drawer and search with “https://github.com/elecfreaks/pxt-Dronebit” in the dialogue box to download it.
Notice: If you met a tip indicating that some codebases would be deleted due to incompatibility, you may continue as the tips say or create a new project in the menu.
Program
Notice: It is suggested to pause for 2 seconds or longer after triggering the take-off command to make sure the operator run away from the drones in case of any hurting accidents.
Link: https://makecode.microbit.org/_fdy88DiaVX9X
You can also download it directly:
Result
After taking off, the drone flys forward for 100cm, then flys to the right for 100cm, and backward for another 100cm, then to left for 100cm and finally lands on the groud.
Case 03: Round Fly
Introduction
Program to make the drone fly to a preset place and then get back.
Products Link
1 x Drone:bit
Picture
Software Programming
Click “Advanced” in the MakeCode drawer to see more choices.
For programming, we need to add a package: click “Extensions” at the bottom of the MakeCode drawer and search with “https://github.com/elecfreaks/pxt-Dronebit” in the dialogue box to download it.
Notice: If you met a tip indicating that some codebases would be deleted due to incompatibility, you may continue as the tips say or create a new project in the menu.
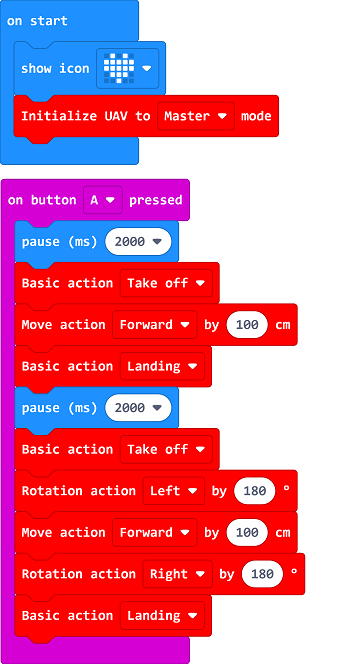
Program
Notice: It is suggested to pause for 2 seconds or longer after triggering the take-off command to make sure the operator run away from the drones in case of any hurting accidents.
Link: https://makecode.microbit.org/_7zU0qEMPVcqT
You can also download it directly:
Result
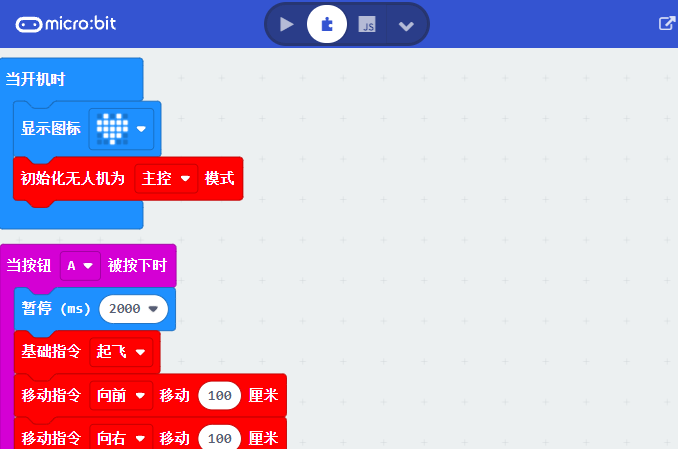
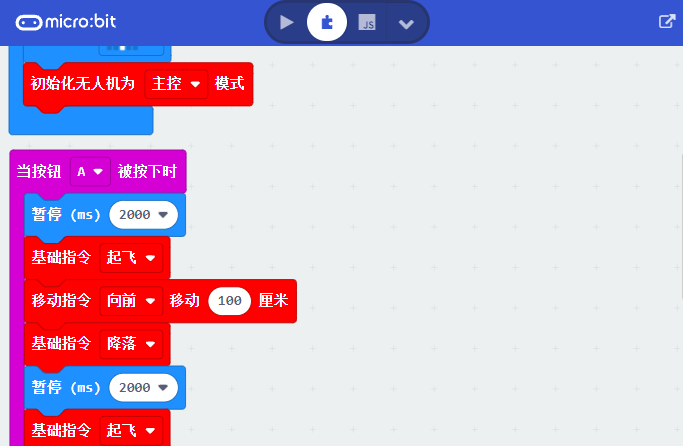
After taking off, it flys forward for 100cm and lands to the ground, then it starts flying back in 100cm by rotating 180 degress, then it lands to the ground.
Case 04: Remote Control with Joystick:bit V2
Introduction
Control the drones with the Joystick:bit V2.
Products Link
1 x [Drone:bit]
1 x [Joystick:bit V2]
Picture
Software Programming
Click “Advanced” in the MakeCode drawer to see more choices.
For programming, we need to add a package: click “Extensions” at the bottom of the MakeCode drawer and search with “https://github.com/elecfreaks/pxt-Dronebit” in the dialogue box to download it.
Notice: If you met a tip indicating that some codebases would be deleted due to incompatibility, you may continue as the tips say or create a new project in the menu.
Program
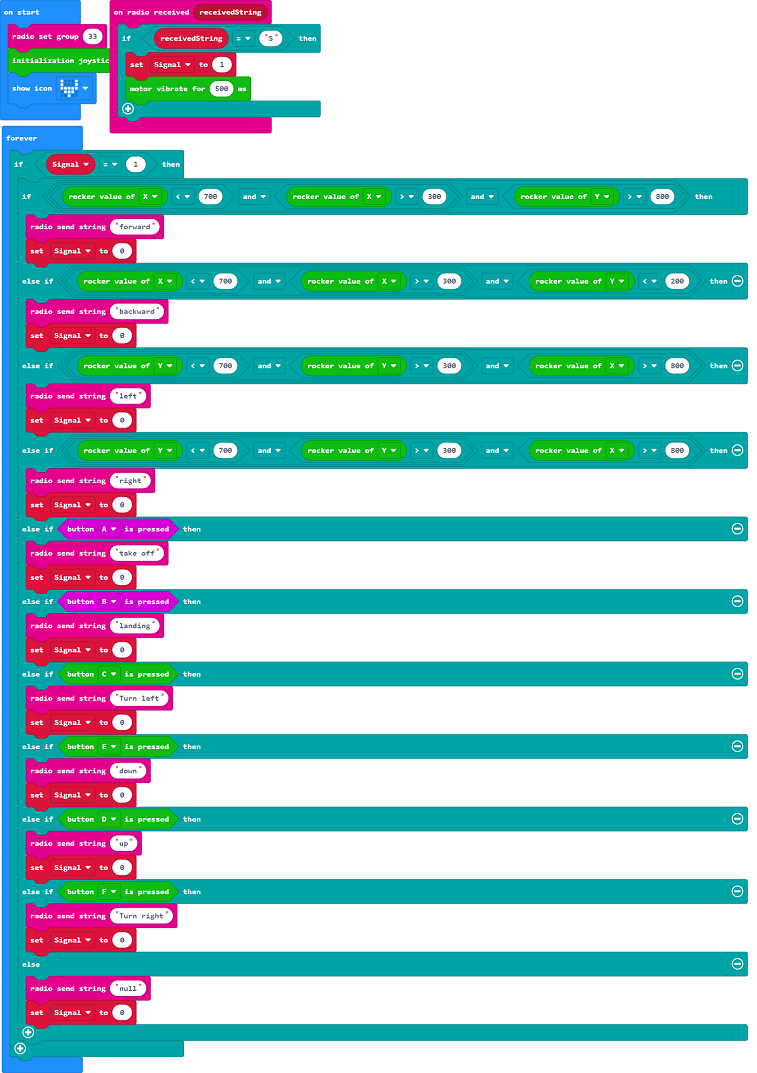
The Remote Control Part:
Link: https://makecode.microbit.org/_9WA7g9Rm5cyu
You can also download it directly:
The Drones Part:
Link: https://makecode.microbit.org/_05Hc6fTUcRTr
You can also download it directly:
Result
Turn on the Joystick:bit V2 and the drone, you can send commands via Joystick:bit V2 after its vibration.
Each command is only working after the Joystick:bit V2 gets vibrated.
The flying directions could be controlled by the stick.
Press button to fly the drone and button B to give landing command.
Press button C to make the drone rotate left in 90 degrees and button F to rotate right in 90 degrees.
Press button D to add the altitude and E to lower it.
